How to Fix Prius 2nd Gen Check Engine Light Codes P1116 and P1121 2003 2004 2005 2006 2007 2008
We have a Toyota Prius 2007 that would occasionally show the check engine light, but didn’t think much of it. At one point, we read that this could signify low coolant so we filled the coolant which made the issue go away temporarily, but quickly came back.
The Prius ran fine UNTIL smog check failed due to the two error codes (P1116 and P1121)
The fix for the Prius 2nd gen error code P1116 and P1121 was to replace the Coolant Control Valve
Step 1 : Confirm the error codes coming from your Toyota Prius
How to diagnose and find the error codes for your Toyota Prius 2nd Gen
Go to Amazon (affiliate link) and buy any OBD scanner. Even a $20 one works fine to read off the error code.
The fancy ones come with bluetooth connectivity / app support / color screens, but the $20 one is good enough to read the error codes.

An OBD scanner will plug into the Prius and show you any error codes the Prius may have. This is exactly what the smog checkers are using.
Plug in the OBD scanner into your Prius
The OBD scanner is where it is marked DLC3 in this diagram

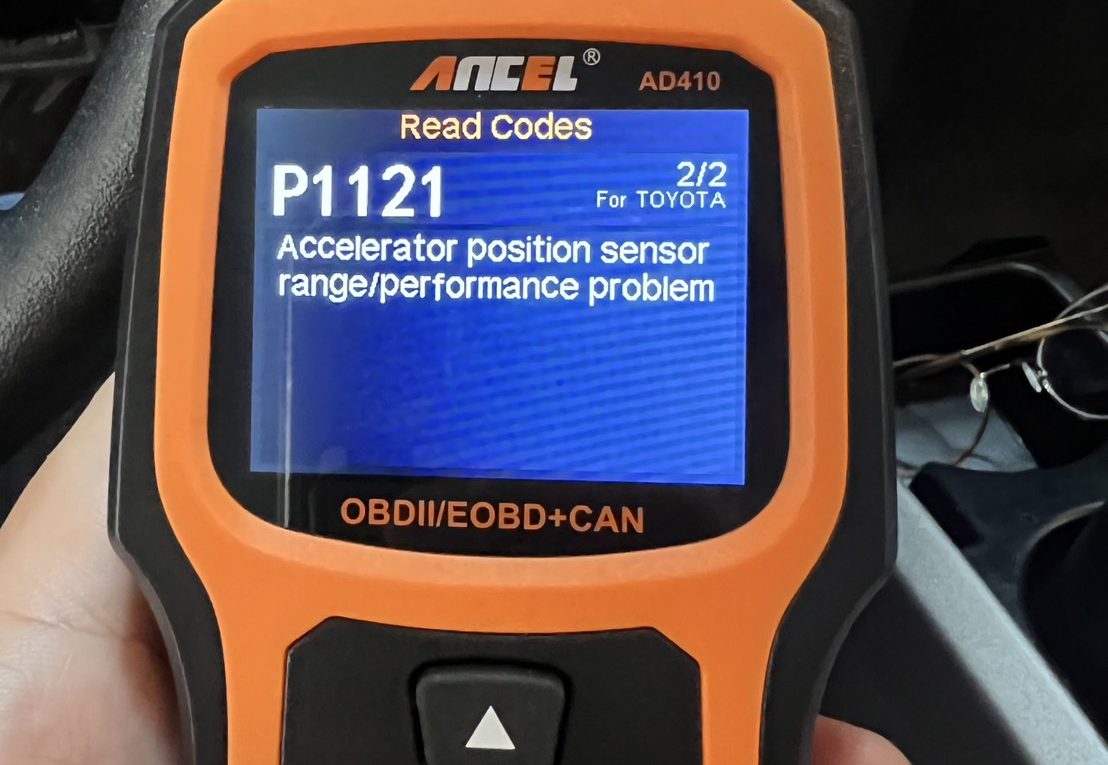
Our OBD scanners showed the error codes P1116 and P1121
Prius P1116 Coolant temperature sensor circuit stack for coolant heat storage system
P1121 – Accelerator position sensor range / performance problem


Step 2 – Fix the P1116 and P1121 errors on the Prius
The fix is to replace the Coolant Control Valve.
Mechanics charge $500-800
Mechanics quoted me anywhere from $500-800.
Doing it at home is ~$200 + up to 3 hours of time
There are plenty of youtube videos on how to replace the CCV (coolant control valve) at home and will require about $100 in tools and 1 to 3 hours of work depending on how good she is.
Step 3 – Get the tools needed for the Prius coolant control valve replacement
Here are the tools needed to do the Coolant Control Valve on your 2nd gen Prius replacement yourself
- Toyota Coolant Control Valve – Part #16670-21010 – $120 – Make sure you buy the genuine Toyota. There are plenty of parts claiming to be genuine on eBay, but there are plenty of counterfeits floating around for $40, Several people on youtube / forums have stated their CCV has quickly given errors from buying cheap alternatives on Amazon or counterfeits on eBay. We bought ours from a local Toyota dealer for $115
- Socket Wrench Size 10mm and 12mm – This is to remove the Coolant Control Valve. If you have any mechanic’s toolset, you probably already have these. If not, just buy or borrow a basic set from Amazon (affiliate link) or your friends
- Hose Clamp Tool or a Bent Nose Plier – $15 – This is to remove the coolant hose from the CCV
- Cork Screw – $5 – This is to stop the coolant from spilling out too much
- Coolant Refill and Funnel – $20 – This is to refill the coolant after all is done
Step 4 – How to replace the coolant control valve on the Toyota Prius 2003 2004 2005 2006 2007 2008
A lot of people tend to do all the work from above, but I found it easier to remove the headlight to access the coolant control valve. Please watch this video
This video is great, but you DO NOT need to unplug your hybrid battery.
Also the corkscrew method works better than the clamp method for the hose.